The spam retention capacity can be customized, with a range of 7-90 days.
↧
How long is mail stored on the Rocket?
↧
How can users manage their own spam?
Spam filter summary emails and the spam user portal let your users manage their spam without IT involvement. They can review emails held as spam, forward emails held as spam, mark emails/senders as not spam, and more. But don’t worry – they can never forward or unlock emails held for security/virus reasons.
Learn about the Spam Summary emails here.
Learn about the Spam Filter User Portal here.
↧
↧
How does the filter determine what is spam?
The Lightspeed Systems Spam Filter module is a powerful tool that filters out viruses and inappropriate content without hindering your ability to work and communicate. When mail is received it is first scanned for viruses. Next, it is processed according to the spam rules. The first pass is a pre scan that generates a spam score. The second pass processes the email for specific rules, which are performed, in order, for each recipient. Learn more about those rules and steps here.
↧
How do I unlock an email held as spam?
This can either be done through the spam user portal (any time) or the daily spam summary email.
Within the portal, check the box next to the email to be sent and then, from the “Select Action” drop-down, choose either “Mark not spam” (to receive future emails from this sender) or “Forward only” (to receive this email without changing rules for this sender).
Learn more about the spam user portal here.
Learn about the spam summary emails here.
↧
SSL Explained
Download our new SSL guide to understand what to do about SSL on your network.
↧
↧
Key Documents and Policies
Here are some quick links to some of our top documents and policies:
Lightspeed Systems Privacy Policy
End-User License Agreement (EULA)
Technical Support User Guide (PDF)
Protecting Privacy: Lightspeed Systems Overview
↧
How to: Filter and Manage Chromebook Devices
If you’re rolling out Chromebooks in your district, we have solutions to help you filter them and manage them!
ChromeOS Mobile Filter – Provides off-network filtering so users and Chromebooks are safe even when they’re off the school network (included with a Lightspeed Systems Web Filter license)
ChromeOS User Extension – Provides seamless single sign-on for your users, so they log into their Chromebooks and automatically get appropriate filtering policies and reporting (included with a Lightspeed Systems Web Filter license)
Classroom Orchestrator – Gives teachers management of Chromebooks in the classroom with screen monitoring, remote control, and more. And gives IT policy controls, from daily schedules to configurations
To add new solutions to help you manage your Chromebooks, contact sales@lightspeedsystems.com
For help with your existing solutions for your Chromebook and ChromeOS devices, contact support@lightspeedsystems.com
Tags: Chromebook, Chromebooks, ChromeOS, Chromebook best practices
↧
Lightspeed Proxy and Meru Access Points
We recently identified an issue where customers would experience extreme latency when using the Lightspeed Proxy module in conjunction with Meru APs. This resolution for this issue has been to update the Meru Controller to the latest software version, 7.0-8-0. This issue appears to effect Controllers running version 7.0-5-0 to 7.0-7-0.
↧
Differentiated YouTube access via GaFE console
Google has formally announced changes to the YouTube safety mode that allows schools more flexibility in YouTube access.
This includes the ability to allow videos that are not normally included in safety mode, as well as the ability to designate users that can receive full YouTube access. Differentiated YouTube access is managed through the GaFE console.
Our web filter is already fully compatible with this new feature from Google.
Please refer to the following Google support article for more information: https://support.google.com/a/topic/6206681
↧
↧
Best Practice: Hiding unused groups in Mobile Manager
Groups in Mobile Manager synchronize automatically with their counterparts in other Lightspeed tools, including Classroom Orchestrator, Web Zones, and My Big Campus. As an administrator, you can hide unneeded groups with a CSV upload, without deleting them entirely.
Archiving, rather than deleting old groups, benefits teachers who have used these groups within My Big Campus to store content and assignments. With the announced End of Life for My Big Campus on July 31, 2016, this is especially important for teachers who want to re-use their MBC-created content by importing it into another Learning Management System.
In this article, you’ll learn how to tidy up the Groups view in Mobile Manager, Classroom Orchestrator, and Web Zones, without removing content your teachers have worked hard to create.
Archiving groups via CSV import
To archive groups, create a groups.csv file, with one line per group, in the following format:
| Column A | Column B | Column C | Column D | Column E |
|---|---|---|---|---|
| unique_sis_group_id | group_name | unique_sis_user_id | unique_sis_school_id | private |
Open the file in a text editor or spreadsheet program, and verify that it contains only groups you want to archive or delete.
- Archiving groups hides the group from Mobile Manager, but does not remove group content that the teacher may have created in My Big Campus.
- Deleting groups completely removes the group from Mobile Manager, and removes all group content from My Big Campus. You should only use this tool to permanently delete groups that you’re sure your teachers won’t need to use again.
Import the SIS files

Important: Because of the potentially far-reaching results of these batch operations, they must be performed by manually uploading and importing the files.
- 1. Log into My Big Campus as a District Administrator. You’ll find these batch tools on the Administration dashboard, under the SIS tab. From there, click More SIS Options to open a menu.
- 2. Select the batch operation to perform, then upload your file. Follow the instructions on the upload page to confirm the action and start processing the file.
Note that SIS imports are performed as scheduled tasks, and may take some time to complete, depending on system load. You’ll see a popup notification when the import has finished processing.
Once again, please proceed with caution — these are powerful tools that can cause non-recoverable changes to user accounts and groups.
↧
How to Block iOS Updates Using the Rocket
Problem:
When Apple releases a new version of iOS, users may decide to download the update while connected to your wireless network. These updates can vary in size with major releases being several hundred megabytes in size. Depending on the number of users downloading the update at once, this can cause extreme strain on your network.
Solution:
You may choose who can download iOS updates from Apple over your network. This article will walk you through creating a Local Category for iOS updates and how to only allow access for select Rule Sets or during off-peak hours.
Creating and Implementing a Custom Category for iOS Updates
Create a Custom Category
- Log into the Rocket web administration interface.
- Open the Web Filter
- Select Categories under the Database
- Click the + Add Local Category button in the upper right corner.
- Give the new, local category a Name and Description (e.g., “iOS Updates”).
- Select the Set default behavior to block option to immediately block iOS updates for Rule Sets you do not explicitly allow.

Add Apple’s Update Servers to the Custom Category
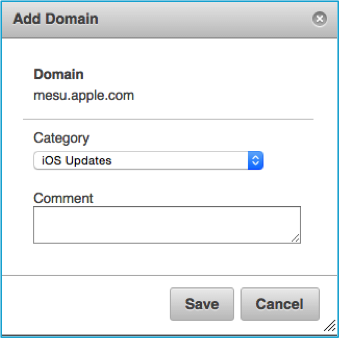
- Next, click Categorized Sites under the Database
- Individually search for the domains below.
- mesu.apple.com
- appldnld.apple.com
- Click on the domain name in the result to change the category.
- Select the Local Category you just created (g. “iOS Updates”).
- Click Save.
- Repeat this process until you have added all sites.
Allow Access to iOS Updates for a Chosen Rule Set
- Log into the Rocket web administration interface.
- Open the Web Filter
- Select Policy Management and then Rule Sets.
- Open the Rule Set you wish to modify.
- Scroll down to Custom Categories toward the top of the category list.
- Click the slider to enable access to iOS updates for this Rule Set.
- Click Save.
- Repeat this process to allow access for additional Rule Sets.

Note: You may additionally use the Schedules option on the Lightspeed Web Filter to allow access to these and other categories during off-peak hours. For instructions on implementing schedules, see the Schedules article on our Community Site.
↧
How does Blocked for Review work?
We are often asked how our review process for the Blocked for Review websites works. Here is a general overview of the process and what we take into account when we review and categorize sites.
There are two ways to submit sites to the Blocked for Review (BFR) page.
- When a user attempts to access a site that is blocked, our access page is displayed with a message explaining the site is blocked and indicating the category it is in. The access page will give the user an option to submit the site for review along with their e-mail address and reason why the site should unblocked. This request is sent to Blocked for Review.
- Sites can also be submitted via http://www.lightspeedsystems.com/archive. The Archive site will provide details on why a site is categorized in a particular.
At the top of each hour all sites submitted for that hour are loaded in our review queue. The review team generally clears the queue within the hour. Domains with reasons/email addresses are the first ones reviewed. Sites with no reasons/addresses are the last to be processed.
Reviewing Sites
When reviewing sites we always take into account who has submitted it (educator, business, student, etc ) and the reason being given. We also evaluate the reason for its current categorization such as the engine categorized it or it has been reviewed/ verified previously. All sites submitted will be Verified (meaning it was looked at and it is in the right category) or Edited (meaning it was looked at and moved to a different category).
URLs and subdomains are not categorized unless they belong in a different category than the domain (e.g. open-site.org is categorized as forums.blogs, however, open-site.org/Sports/Baseball/Terminology/B/Batter is categorized in education)
All automatic revisions to categorization are updated nightly. Manual revisions through the blocked for review processes are updated every 35 minutes.
And that is how the process works.
↧
Bing Predictive Search
The Lightspeed search query and suspicious search query reports generate information based on search queries that pass through the Rocket appliance. This can lead to reports based on predictive searches made to the search engine since, although not submitted by manually typing the query; the search is being made by the browser. We have identified the predictive results of Bing to be linked to the search engine Bing.net as opposed to Bing.com. When generating your search engine query reports we recommend running the reports based on the search engine Bing.com to omit predictive results.
To provide an even higher level of security we recommend implementing the use of Bing for the Classroom: https://www.bing.com/classroom. This option from Bing will allow full safe search functionality to be incorporated based on the IP address of your organization. This is an SSL site so Lightspeed would also recommend incorporating the use of the Lightspeed Proxy in conjunction with a proxy PAC file for successful search engine reporting and keyword blocking.
See also:
How to create PAC files to proxy specified domains or not proxy specified domains
↧
↧
How does Lightspeed protect against malware?
The Lightspeed Systems Web Filter protects your network from malware and other malicious content by blocking it before it even reaches your network.
Our database categorizes sites with demonstrated or potential security risks into several security categories. We use our team of experts to fully analyze the security risk that sites pose, and categorize accordingly. These categories are blocked by default when you turn on your Lightspeed Systems Web Filter.
Many sites look fine to a regular web visitor. This is because a site in the Security.virus, Security.phishing, Security.malware, Security.potentially_unwanted_applications and Security.spyware categories are only effective to the extent that they appear completely legitimate; if they appeared to be a risk then users would not visit them nor provide the information they are after.
Unknown URLs (those not yet categorized by us) are another concern when it comes to malware. Because our URL database has billions on entries, most legitimate sites are already categorized. With your Lightspeed Systems Web Filter you can block unknown URLs. Then, when a user tries to access one, our database team is alerted and then reviews and categorizes the site.
Our team of robots and live people is constantly crawling the web and reviewing sites. We stay on top of the latest security risks so we can block them in our database before your users visit them (intentionally or unknowingly). When we find a new threat, it is updated in our database in real-time and pushed to Rockets around the world in minutes.
↧
Real-World Usage Scenarios for SSL
Recommended Prior Reading:
- Six Things You Should Know About Filtering SSL
- Want to know more about SSL? Download our “SSL Explained” whitepaper.
Real-World Usage Scenarios
Now that you have a better understanding of SSL, let’s bring up some real-world usage scenarios and how they would be implemented with the Lightspeed Systems Web Filter. It is possible you may have already encountered some of these situations or this is the first time you’ve heard of them. In either case, learning from real-world scenarios should help bring to light the importance of handling SSL traffic in different situations.
SCENARIO 1 – “Basic Blocking of SSL Traffic by Category”
Problem:
You have installed, configured, and are now using the Lightspeed Web Filter in your environment. You need to ensure users are unable to access blocked content by establishing an encrypted (HTTPS) session.
Solution:
Simply enable the Decode SSL Certificates option under Web Filter > General. This will decode the domain from the website’s SSL certificate or, utilizing TLS, will analyze the SNI response from the web server. A category lookup is then performed on the domain, and if in a blocked category, the Rocket will not allow the SSL tunnel to form.
Things to Consider:
- Prevents users from circumventing the content filter using HTTPS.
- Reporting will show what domains have been accessed.
- Private user information remains confidential (banking info, etc.).
- Blocking determined by the domain listed in the SSL certificate or the SNI response from the web server.
- Since you’re not decrypting traffic to Google and YouTube, it is recommended that Enforce Google Safe Search be enabled to return safe search results.
Web Filter > General > Enforce Google Safe Search
SCENARIO 2 – “Selective Decryption: Yahoo Images & YouTube”
Problem:
You have been using the SSL Decoding option from Scenario 1 and have decided you need more granular control over several websites. Specifically, you want to redirect Yahoo Image Search to Google Image Search and want to know what YouTube videos are being watched.
Solution:
In this situation, you will leave the “Decode SSL Certificates” option enabled and have chosen to use a Proxy Auto Configuration (PAC) file to send the selected traffic to the Proxy Server. The SSL Decoder will continue to analyze and deny access to blocked domains over SSL. The Proxy Server will decrypt the traffic it is sent, allowing for more granular control and reporting of that traffic.
Note: Before Implementing these settings you should discuss this with the Lightspeed Systems Support or Engineering team to ensure that your Lightspeed Rocket appliance(s) are properly sized for this configuration.
What You’ll Need:
- 1. Enable the Proxy Server role on the Rocket.
Administration > Server Roles > Proxy Server - 2. Enable “Decrypt SSL traffic” within the Proxy Server module.
Web Filter > Proxy Server > Decrypt SSL traffic - 3. Deploy the Trusted Man in the Middle SSL certificate to client workstations.
Certificate Download Links: Administration > SSL Certificate - 4. Create a PAC file then upload it to the Rocket.
Web Filter > Proxy Server > PAC Files
Community KB: Create PAC Files to Proxy Specified Domains - 5. Deploy the PAC file to client workstations.
Community KB: Deploying a PAC file with Microsoft Group Policy
Things to Consider:
- Reporting will show full URL detail of the domains sent to the Proxy Server including the specific YouTube video that was viewed.
- Ability to redirect users from images.search.yahoo.com to images.google.com while allowing access to other Yahoo services.
- Since only select traffic is being sent to the Proxy Server for decryption, the Rocket requires fewer resources to process the decryption.
SCENARIO 3 – “Using the Lightspeed Systems Campus Library”
Problem:
This scenario assumes you are using the SSL decoding option from Scenario 1 and performing selective decryption of websites from Scenario 2. You want to allow teachers to use YouTube but need to ensure only educational video content is presented to students.
Solution:
Employ the Lightspeed Systems Campus Library. By combining SSL decryption of HTTPS-enabled media sites along with the Campus Library, students may access education-oriented video without the need to allow access to top-level sites like YouTube or Vimeo.
What You’ll Need:
- 1. First, contact Lightspeed Support to enable the Campus Library.
- 2. Next, enter a fully qualified hostname to access the library.
Administration > Campus Library > Hostname - 3. From the dropdown list, select the maximum grade level content allowed.
- 4. Finally, create an ‘A’ record in your internal DNS to point this hostname to the IP of the Rocket management interface.
- 5. You can now access the Campus Library through the hostname you created, (e.g. http://campuslibrary.mydomain.org).
Community Manual: Using the Campus Library.
Things to Consider:
- When utilizing the Campus Library, direct access to YouTube can be disabled.
- Teachers may login to the Teacher Dashboard to add content to the library.
- Additional domains may need to be added to your PAC file (e.g. vimeo.com).
SCENARIO 4 – “Restrict Gmail Access to the District’s GAFE Domain”
Problem:
Your district uses Google Apps for Education extensively and has allowed students to login to their GAFE E-Mail from school. Unfortunately, students have been accessing their personal Gmail as well. You would like to restrict Gmail access to only the District’s approved GAFE domain from inside the district.
Solution:
You can create Google Apps Domain lists to limit access to Google Apps tied to specific domains. For example, if you set the restriction to yourschool.edu then users would only be able to use Google apps tied to yourname@yourschool.edu Google content, not yourname@gmail.com content.
What You’ll Need:
- 1. Follow the steps in Scenario 2 to enable SSL Decryption.
- 2. When building your PAC file, include an entry for google.com.
- 3. Enter your Google Apps domain into the Proxy Server module.
Web Filter > Proxy Server > + Add Google Apps Domain

- 4. Repeat step 3 to add any additional domains (e.g. student domains).
Things to Consider:
- You must enable the proxy option “Decrypt SSL traffic” to use this feature.
- You cannot have google.com defined in the SSL Decryption Exclusions.
- If using Chromebooks, add the following domains to the SSL Decryption Exclusion list: https://support.google.com/chrome/a/answer/3504942
SCENARIO 5 – “Block & Redirect Pages Within HTTPS”
Problem:
Using the solution from Scenario 1, you have prevented access to blocked content trying to establish encrypted (HTTPS) sessions. You would like to redirect these sessions to a block page or to a different website.
Solution:
By design, SSL is fully encrypted. This encryption detects any attempt to decrypt this traffic between the user machine and the server and if any is found it will shutdown the connection. In order to insert a block or redirect page, it is necessary to utilize a Trusted Man in the Middle proxy.
What You’ll Need:
- 1. Follow the steps in Scenario 2 to enable SSL decryption.
- 2. When building your PAC file, include any entries for domains you would like to include block pages or redirects on.
- 3. Instead of dropping the SSL connection, the Rocket will display the desired block page or will redirect the traffic to another website.
Community KB: Custom Access Pages
Community KB: Redirected Categories
Things to Consider:
- Use SSL decryption only for regularly-accessed, blocked domains.
- By continuing to use selective SSL decryption, private user information remains confidential (banking info, etc.).
SCENARIO 6 – “Google & Bing Search Queries
Problem:
You have been enforcing Google Safe Search by following the solution in Scenario 1; however, you would like to go a step further and see what students are searching for on Google in order to utilize Blocked Search Keywords.
Solution:
While Google Safe Search provides safe, filtered results, the session between the user and Google is still encrypted, thus, their search keywords are also encrypted.
What You’ll Need:
- 1. Follow the steps in Scenario 4 to enable SSL decryption for google.com.
- 2. Follow the steps on the Community Site to create block search keyword lists.
Web Filter > Block Search Keywords > New List
Community KB: Block Search Keywords - 3. RECOMMENDED: To provide an even higher level of security we recommend implementing the use of Bing for the Classroom: www.bing.com/classroom. This option from Bing will allow full safe search functionality to be incorporated based on the IP address of your organization. Since this is an SSL site, bing.com should also be added to your PAC file for decryption.
Things to Consider:
- You will now be able to see all search queries sent to Google and Bing for the Classroom as well as utilize blocked search keyword lists more effectively.
- The Image thumbnail Filter may be enabled for added protection against blocked and unwanted content.
Web Filter > Policy Management > Rule Sets > Select your rule set
Enable “Filter Image search thumbnails (Google and Bing)”
- If using Chromebooks, add the following domains to the SSL Decryption Exclusion list: https://support.google.com/chrome/a/answer/3504942
↧
Smart Groups: App Lock Limitations
In order to use App Lock with an app that was deployed using a Smart Group, the app must also be added to any other Group where you would like to use App Lock.
Lightspeed Systems does not allow apps from a Smart Group to be selected for App Lock in non Smart Groups.
The reason for this is that the expectation would be that all users in the group where the lock is configured would get the app lock. However, this may not be the case.
For example, if the app was allowed to lock in the main group, but the app was deployed in the Teachers Smart Group, only users in the Teachers Smart Group would have the app installed on their devices and be able to lock into it.
↧
Using a Global Proxy on the Web Filter for Off-Network Filtering
As an administrator you may need to filter content for devices when they are off (outside) of your network in addition to filtering content when these devices are within your network. For example, students use school-supplied devices that they can take home. To ensure content filtering at all times you can configure your devices to use a global proxy.
Overview
Windows, Mac, and Linux devices can use Lightspeed Systems Mobile Filter Agents for off-network content filtering. When these devices are in-network with a Rocket appliance the Mobile Filter Agent is turned off and content filtering is provided directly by the Rocket appliance. When these devices are off-network the Mobile Filter Agent is turned on and content is filtered through the Rocket. Therefore, Lightspeed Systems recommends using Mobile Filter for off-network filtering for these devices.
However, due to restrictions emplaced by their manufacturers, there are no Mobile Filter Agents for iOS, Android, and Chrome OS devices. For Android devices you can use the Lightspeed Systems Mobile Browser. For some of these devices, the Mobile Browser is the only solution for off-network content filtering. However, since all content filtering is performed by the Mobile Browser app, Lightspeed Systems does not recommend the Mobile Browser for Android.
For all devices you can use a global proxy on a Rocket appliance for off-network filtering. The steps to configure a global proxy are described below.
Before You Begin
Before you configure a global proxy please keep the following considerations in mind:
- If you use tiers use different proxy ports for each tier.
- The Rocket is limited to 20 proxy ports.
- Because the proxy is always on, it will generate a larger load on the Rocket appliance. Therefore, you should determine the number of devices you are looking to use with proxy and review your infrastructure.
Configuration Steps
- 1. Follow the steps documented in Configuring a Rocket as a Proxy Server to configure the Rocket appliance as a proxy server.
- 2. Configure the device so that it uses the proxy server. Refer to the device’s documentation for more information. On iOS devices, for example, tap Settings, Wi-Fi, and the icon at the right-hand side of the Wi-Fi network’s row and then tap Manual under HTTP Proxy as shown below.

Tip:
You can use Lightspeed System Mobile Manager to push global proxy policies to iOS 6 and later devices in supervised mode. See the Global Proxy page in the Mobile Manager documentation for more information.
Off-Network Filtering Examples
The following is an example of an iPod Touch using the Lightspeed Systems Mobile Browser off-network.

And the following is an example of an iPod Touch using the standard Safari browser but filtered by a Rocket acting as a global proxy.

↧
↧
Chromebooks and Lightspeed Rocket
The following article was provided by Nikkol Bauer, Henry County.
Passing User Authentication from Chromebooks to the Rocket
Configuring the Rocket and GAFE to pass user authentication from Chromebooks to the Rocket is pretty straight forward. Unfortunately, the username that is passed is the user’s email address, so be aware of this should you need to conduct any inspection of a particular user’s activity, i.e. you will need to search by email address, as well as AD credentials.
- 1. Ask the state to open port 80 and 443 on your district’s Rocket server.
- 2. Follow the instructions here to set up a Google Authentication Source. The section titled “Configure a Google Authentication Source on the Rocket Appliance” will need to be done twice using the same Client ID and Client Secret, once for district.kyschools.us and another for stu.district.kyschools.us.
- 3. In the Google Admin Console, push the Lightspeed User Agent to your users:
- 1. Click Device management.
- 2. Click Chrome management.
- 3. Click User settings.
- 4. Make sure the correct organizations is selected at the left. If you want to push this to everyone, you can just have the organization (for example, district.kyschools.us) selected.
- 5. Scroll down to Apps and Extensions and click the link Manage force-installed apps.
- 6. Under Chrome Web Store search for Lightspeed User Agent and click Add.
- 7. Click Save.
- 8. Click Save Changes.
Creating Filter Assignments for Chrome Authentication
If you would like to apply different rule sets for different types of users that login to Chromebook (for example, if the Tier Policy is not acceptable for all of your users), then you will need to create new Assignments in the Rocket Policy Management section of the console. There are two viable methods: User Group and User OU. In both of these cases, this will apply to Google groups and Google OUs.
If you choose to filter by OU, you need to add an assignment for each OU that directly contains users.
“I wanted to be able to leverage our already existing AD groups of DIST Students No Internet, DIST Students Restricted Internet, DIST Staff, and DIST Students. So I added rules in GADS to sync those groups. Note that users have to live in the group itself and not in a subgroup.”
Syncing AD Groups
In order for AD Groups to sync, there must be an entry in the email address property of the group. The 4 groups above did not have an email address filled in, so I created an email for each one. This does not need to be a working email.
- 1. In the GADS configuration utility, make sure that the Group check box is selected in General Settings.
- 2. In Groups, select Add Search Rule.
- 3. On the LDAP tab, enter the following, change the items in red as appropriate and add as many groups as you will need:
- Scope: One-level
- Rule: (&(objectCategory=group)(cn=DIST Students No Internet))
- Base DN: ou=Users and Groups,ou=_District Admins,dc=district,dc=ketsds,dc=net
- Group Email Address Attribute: mail
- Group Display Name Attribute: displayName
- User Email Address Attribute: mail
- Member Reference Attribute: member
Adding an Assignment in the Rocket for Google Authentication
- 1. In the Rocket Console, go to Web Filter and then Policy Management.
- 2. Under Type, select User Group.
- 3. Under Authentication Source, choose the Google Authentication source for either your staff or your students (remember that you have two authentication sources for Google).
- 4. Under Assignee, enter the part of the group’s email address before the @.
- 5. Select the Rule Set you want to apply.
- 6. Click Save.
Filtering Off Campus
While I haven’t tried this myself, this is possible by pushing the LSChromeFilter to your Google users. Read more about that here. You will need to register your GAFE domains on mobile.lsfilter.com. When you click Sign Up, enter a username, email and for the Serial Number use the Customer ID found in Administration.
Thanks very much for these great tips, Nikkol!
↧
Translations & Localization
Our products are available worldwide! This list shows the languages our product interfaces are currently available in.
Rocket
Arabic (العربية)
Dutch (Nederlands)
Danish (Dansk)
English (English)
French (Français)
German (Deutsch)
Italian (Italiano)
Portuguese (Português)
Spanish (Español)
Mobile Manager
Danish (Dansk)
Dutch (Nederlands)
English (English)
French (Français)
German (Deutsch)
Italian (Italiano)
Japanese (日本語)
Norwegian (Bokmål)
Portuguese (Português)
Spanish (Español)
Swedish (Svenska)
Turkish (Türkçe)
Classroom Orchestrator
Danish (Dansk)
French (Français)
German (Deutsch
Italian (Italiano))
Spanish (Español)
Launch Dashboard
Danish (Dansk)
French (Français)
German (Deutsch)
Italian (Italiano)
↧
Can Mobile Manager push Windows executables to devices?
With a free tool such as MSI Wrapper, you can package exe files as an MSI for distribution via mobile device management. Here’s how MSI Wrapper works.
- 1. Install MSI Wrapper.
- 2, Install the desired .exe file. For our example, we’ll use VLC.
- 3. Run MSI Wrapper and advance passed the Welcome screen by clicking Next.
- 4. As below, choose the .exe file to be wrapped. The default settings are appropriate and the MSI Output File Name auto generates. Click Next.
![MSIWrapper-1]()
- 5. On the next screen, click Look Up and then select your executable’s Application ID from a list of programs on the computer. For the Upgrade Code, select Create New, then click Next.
- 6. On the Properties step, you should be able to get all the values from the Registry option. Click Next.
![MSIWrapper-2a]()
- 7. More Properties allows you to enter optional information. Click Next.
- 8. A Parameters page allows for install arguments. In VLC’s case “/S” will invoke a silent install. Click Next.
![MSIWrapper-3a]()
- 9. On the Summary page, you can optionally save these settings in case you need to modify them later. Then click Build to create the MSI. A Status page documents progress and any errors.


Once you’ve built your MSI file, you can test installing it with Mobile Manager.
↧